Example of using Gitlab CI#
Goals#
Run tests in Gitlab CI.
Receive SLA results automatically.
Solution#
Download the
.gitlab-ci.ymlfile and paste it to the root of your GitLab repository. For more information, see Tutorial: Create and run your first GitLab CI/CD pipeline and .gitlab-ci.yml keyword reference.In the file, enter the values of the variables:
API_TOKEN.value. The API token.
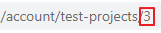
TEST_PROJECT_ID.value. The ID of the test project. To find the ID, follow these steps:
Go to the Projects page.
Select the project. The ID of the test project is displayed in the address bar:
TEST_PROJECT_VERSION_ID.value. The version of the test project. If the parameter is not specified, a test for the latest version of the project will run. To find the version, follow these steps:
Go to the All tests page.
Select the test.
Click Test project. The version of the test project is displayed in the address bar.

Save the file.
When you commit the file to your repository, the runner runs your jobs. The job results are displayed in a pipeline.
Note
If the pipeline displays curl: (22) The requested URL returned error: 404, make sure that the values of the variables in the .gitlab-ci.yml file are specified correctly.
The .gitlab-ci.yml script#
The .gitlab-ci.yml file contains the script that:
Sends a request to run the test.
Gets the test ID from the response.
Checks the SLA status every 30 seconds. If the SLA status has a value other than PROCESSING, then the script sends a request to get the results of the SLA test.
Checks the SLA status. If the SLA status is FINISHED, then the script gets the SLA result from the response.